Google Analytics Basics

18. 12. 2016
|
Analytics
|
Lukas Blazek / Unsplash

How do you know if your website is a success? Or how many users visit your website on a daily basis, how long they linger there, from where and how they reach the site or where they leave it? What can you learn from your visitors’ interaction with your website?
To track and understand all of the above you will need an analytics program. In most cases Google Analytics will be your first choice – it’s free and effective.

How do I set up Google Analytics on my website?

The installation of Google Analytics is pretty straight forward: First of all you’ll have to register an account with Google. After typing in all requested information about the website you will get a short JavaScript code from Google. This cade has to be added to each and every page of the website.

The easiest way is through a CMS like WordPress. There you will find an input field for your code (normally in the theme option section) that, once the code is entered, implements it automatically to all pages.

In the case that your WP installation doesn’t offer this option you can do the trick by installing a plug-in like MonsterInsights.

Of course you can also always manually add the code to a WordPress header. Just make sure to use a child theme as any theme updates might otherwise override the Analytics snippet later on.

With static websites a manual implementation is the only choice. A site-wide “search and replace” is highly suggested to ensure complete data tracking.

Google recommends adding the code just above the closing </head> tag. Doing so brings the big advantage that other Google services will work better in combination with Analytics that way.

You can instantly see whether the code was implemented correctly or not in in Google Analytic’s “real time – overview” report. If everything went right you should be able to see all active sessions.

Further installation details and tips can be found on Google’s Analytic Support website.

What’s the best way to set up Google Analytics?

Defining goals

To make the most of the data collected by Analytics it is always advisable to be as clear as possible about the goals you set for your website and how you define them. What are the users supposed to do on my website? Buy products and services, submit a form or just hang around on specific pages?
What does a successful user interaction look like on my website?
What are my guidelines for goal completion?

Setting goals

Setting and evaluating goals in Google Analytics really is no rocket science.

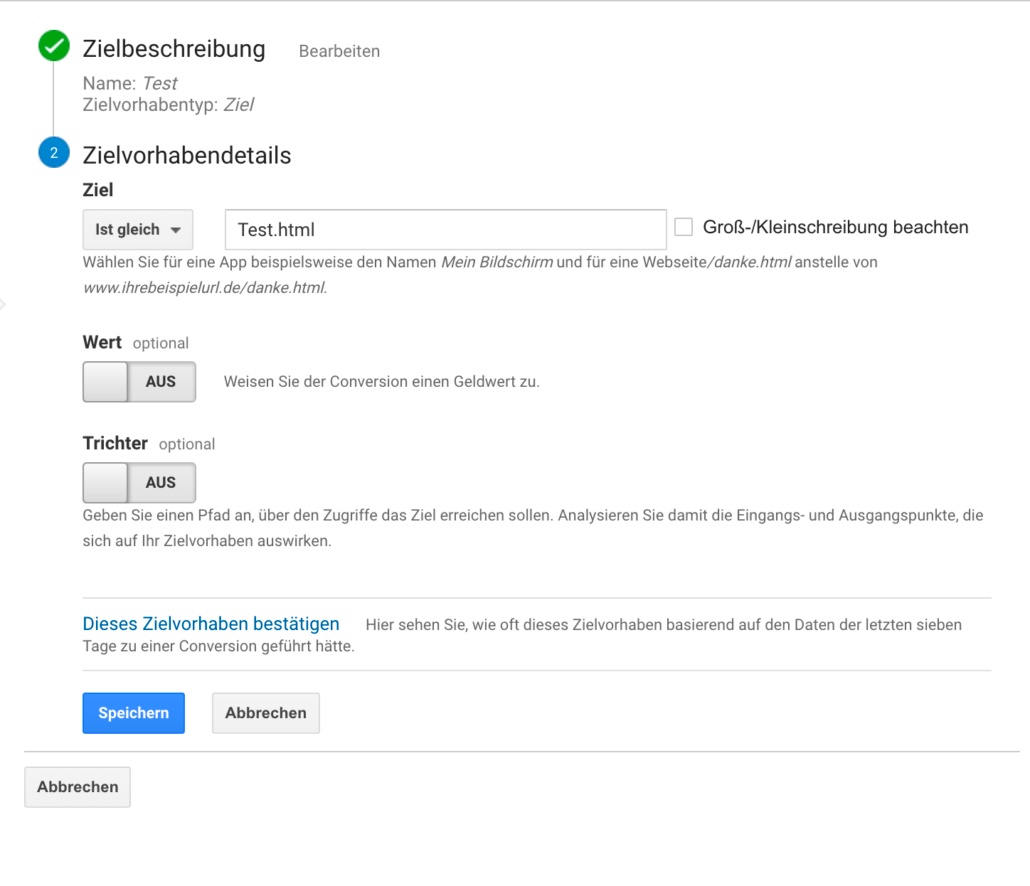
Just navigate to the “Admin” section and select the “Goals” option in the “View” column. Click on the “+ New Goal” button and follow the instructions. The program already provides templates for the most common goal types.

In case you want to set form submissions as a goal it is best practice to have Analytics count every visit to the “thank you” page that is loaded after a successful submission. Doing so will record every user submitting a certain form.
If the goal has a certain value, e.g. purchases on shopping websites, you can also attribute those to your goals. Otherwise you can always set the value to 1 or leave it blank.

Zielvorhaben Analytics

Establishing funnels

A “funnel” equals a series of pages a user has to visit before a goal conversion can be triggered. The name is a metaphor, as on the first funnel page you will find the most views which will then thin out and narrow down further along the way, as some users are sure to leave the website before reaching an actual goal completion.
Through funnel tracking we can visualize how efficiently a goal completion process is designed. Wherever there is a prominent user loss, we can guess there is a weakness in the process and room for optimizations, be it an overly complex or poorly designed and user unfriendly page. Funnels allow us to localize and rectify these weaknesses.
To set up a funnel you must first create a “destination” type goal.

You will find the “funnel” option in the “goal details” section. Here all individual steps a user has to take before triggering a goal conversion have to be listed. To later analyze and evaluate the collected data go to “Conversions – Goals – Funnel Visualization” in the reporting view.

Reports

Reports surely are the most interesting aspect of Google Analytics. The importance of the individual report types depend on each project’s characteristics. The “Dashboard” can be customized to meet individual needs, e.g. by adding often used reports and removing irrelevant ones.

The most informative reports on Google Analytics:

Conversions – Goals – Overview:
The one stop overview for all defined goals.
This report will only be displayed if there is at least one defined goal available.

Acquisition – All Traffic – Channels:
Show how and from where users came to the website. The data is grouped by traffic source (e.g. Organic Search, Paid Search, Direct hits, Referring websites, etc.). This report gives good insight into the development of different traffic sources.

Behavior – Overview:
Here you can find out which pages of your website are trending and attract the most traffic. There is a lot of insight to gained from this report about user behavior on a website, letting your draw conclusion about your audience’s interests for future content and product development.

Behavior – Behavior Flow:
Shows on which pages users enter a website and what they do afterwards. Also indicates where most users leave the site. Once again there is a lot of insight into user behavior and audience preferences to be gained here, that can be used to make a website more attractive and enhance user experience.

Exclude internal traffic from reports

Many website admins often spend a lot of time browsing their own websites thus distorting the data collected by Analytics. In some extreme cases we’ve seen companies where internal traffic even overweighed the regular one. That’s why it is crucial to keep reports as untarnished as possible. To do so it is good advice to block one’s own IP address from being tracked by Google Analytics.
To do so, create a new filter in the “Admin” view’s “Filters” section. Just select “Exclude”, “traffic from IP addresses” and enter your own IP address into the box below. Don’t forget to save!

Filter Analytics

For more detailed instructions see Google Analytics Help.

EU GDPR compliant Google Analytics setup

To be on the safe side while using Google Analytics on a website in the EU, there are some points to be considered.

Update:
According to most european data protection authorities, Google Analytics may only send data to Google if the user has given his consent. Consent is now usually granted via a privacy pop-up that the user must fill out before he can use the site. The consent is stored for further visits to the site via cookie.

Furthermore, the IP address must be pseudonymized, the data processing agreement must be accepted and the use of Google Analytics must be explicitly stated in the privacy policy.

Google Analytics offers a wide variety of functions that haven’t been discussed in this basic tutorial. However reading the above should put anybody in the positions to correctly set up and implement Analytics to their page.